
One option for automating a container with data is to store the data within the container image. However, this requires a copy of the data to be in each container you run, which can lead to wasted resources if the containers are scaled up. A better option is to store one copy of the data in a Docker volume and then share that volume between containers.
You can think of a Docker volume as a folder that exists outside of the container filesystem but is still accessible by the containers running on the same host. When you create a new container, you can either mount an existing volume or create a new one. If you create a new volume, Docker will automatically create a new storage layer on the underlying host filesystem and initialize it with the data you specify.
Once you have created a volume, you can use it to store any type of data, including static files, application data, or logs. You can also use volumes to share data between containers.
For example, if you have a web application that runs in one container, you can use a volume to store the application’s source code so that the other containers in your deployment can access it. This allows you to keep your application’s source code separate from the runtime environment, making it easier to update and redeploy your application.
In addition to sharing data between containers, you can also use volumes to persist data when you stop and start your containers. This is a great way to keep your data safe even if your containers are accidentally deleted or stopped.
In this guide, you will learn how Docker volumes interact with containers. You will do this by creating new containers and using volumes to store and share data between them. Then, you’ll discover how to clear up space that is left behind by anonymous volumes that are automatically generated by the containers. Finally, you’ll learn how to back up your Docker volumes data.
Let’s get started!
Prerequisites
- To follow this guide, you should be familiar with the basics of working with Docker containers.
- This guide assumes that you are using a Linux host. This guide uses CentOS, but the same steps should work on any other Linux distribution.
- You must have Docker installed and running on your host. If you don’t have it installed yet, follow the instructions in our Installation guide.
- A user account with root privileges
- You have Docker installed on the Linux host.
Discovering Anonymous Docker Volumes
When you create a new Docker container, by default a new anonymous volume is created on the host filesystem. This volume is used to store the data that is required by the container.
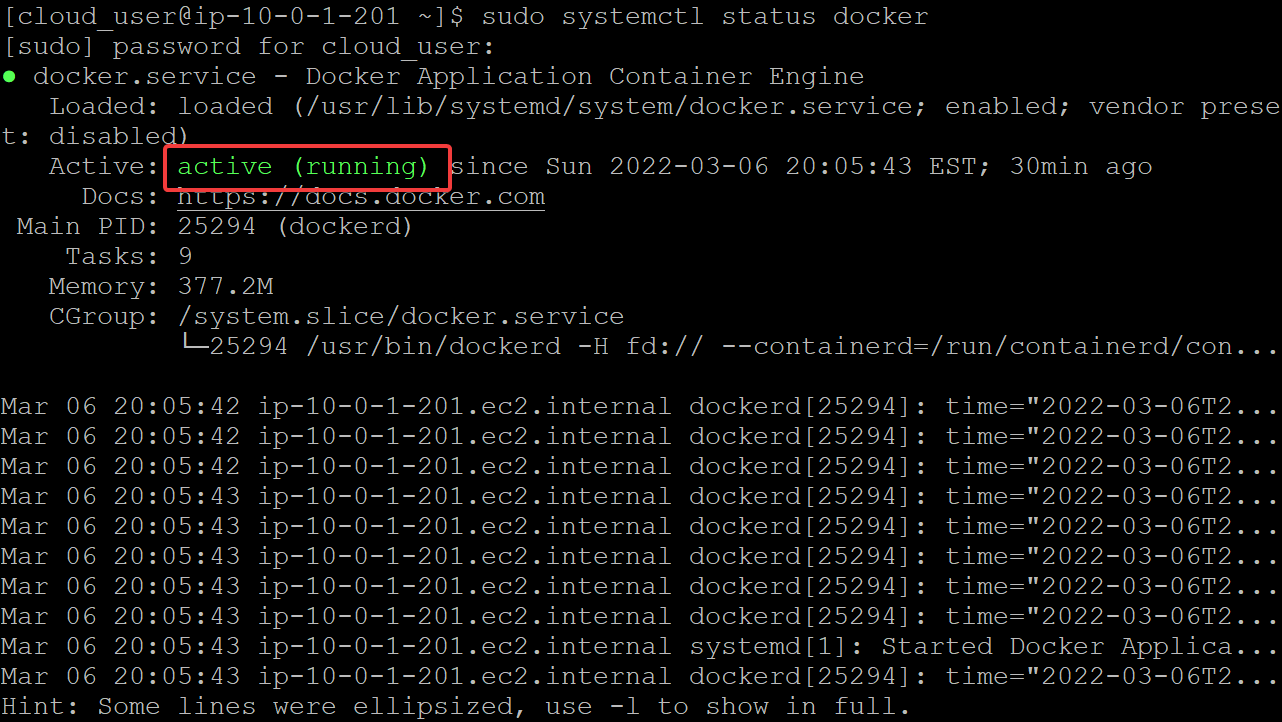
1. Run the following command to check if docker is running and active.
sudo systemctl status docker
2. Run the following command to add your user account to the docker group so that you can run docker commands without using sudo. Once you have added your user account to the docker group, log out and back in so that your changes take effect.
sudo usermod -aG docker $(whoami)
3. Run the following command to pull some images from the Docker registry to your host. You will use these images to practice creating and working with Docker volumes.
docker pull postgres:12.1
docker pull bash
docker pull httpd:2.4
4. Run the following command to list the images that are currently on your host to verify that the images have been pulled.
docker images
5. Run the following command to see if there are any active volumes on your host. You should see an output similar to the following.
docker volume ls
You should see an empty output.
6. Run the following command to create a new container and verify that a new anonymous volume has been created on the host. You use the -d flag to run the container in the detached mode so that you can continue to work in the terminal. You use the –name flag to give the container a name so that you can easily identify it. You use the postgres:12.1 image here since Postgres needs background volumes to store its data. You should run two containers, one for each of your Postgres databases for good measure and more information to see.
docker run -d --name db1 postgres:12.1
docker run -d --name db2 postgres:12.1
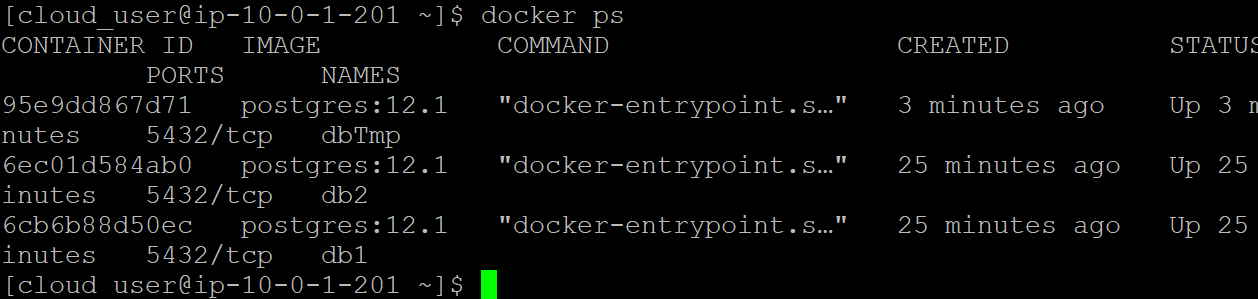
7. Run the below docker command to list the containers that are currently running on your host.
docker ps
You now have two containers up: db1 and db2, as shown below.
8. Now, list the volumes that have been created on the host.
docker volume ls
You will see output similar to the following. Once Postgres starts it needs a place to store its data. Postgres doesn’t want to lose its data, so Postgres automatically creates anonymous volumes. The volumes are named with a random string of Hex characters appended to it(e9f338… and ee3423…).
Let’s look closer at the volumes by using the docker inspect command.
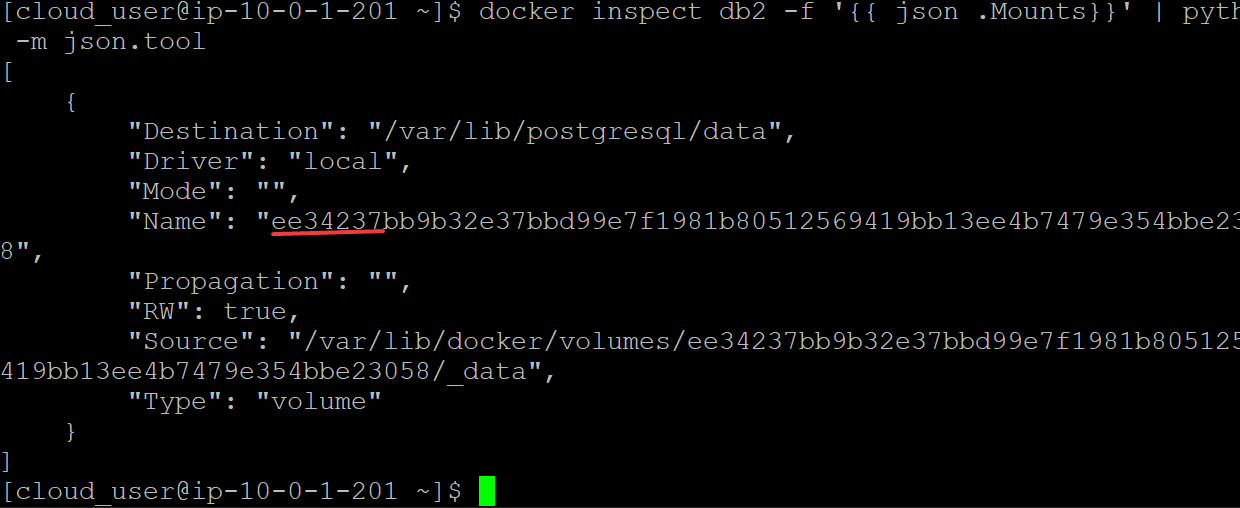
9. Run the below command to get more information about the db1 container in a human-readable format.
docker inspect db1 -f '{{ json .Mounts }}' | python -m json.tool
As you can see below, the e9f338 Name line matches with the output of the docker volume ls command output above. This line tells you that this volume is associated and mounted to with the db1 container.
10. Do the same to inspect the db2 container.
docker inspect db2 -f '{{ json .Mounts}}' | python -m json.tool
You will see that the output is exactly the same as the db1 container, except for the volume name which will be different. This output confirms that Docker creates a new anonymous volume for each container that is created.
11. Run one more container. But this time, we’re going to use the –rm flag and see what happens with the volumes. We named this container dbTmp. Let’s find out!
docker run -d --rm --name dbTmp postgres:12.1
We now have three containers: db1, db2, and dbTmp up and running
docker ps
12. List the volumes again.
docker volume ls
You will notice that a third volume has been created for the dbTmp container.
13. Now, stop the db2 along with the dbTmp container with the below command.
docker stop db2 dbTmp
13. List the containers and the volumes again.
docker ps
docker volume ls
As shown below, the only container that is left running is the db1 container. However, the volumn for the dbTemp container is now gone but the volume for the db2 container(ee3423…) is still there.
This behavior is expected. The –rm flag deletes the container after it has stopped, along with any associated volumes. The volume for the dbTmp container is gone because we stopped the dbTemp container. Since we did not specify the –rm flag when we created the db2 container, the db2 container and its associated volume remains on the host even we stop the container. The takeaway from this example is that you need to be careful with the –rm flag. If you stop a container that has an associated volume, the volume will be deleted.
Creating a Docker Volume
A Docker volume is a named storage container that you create using the docker volume create command. You will then use the volume to store data or to share data between containers.
1. Run the following command to create a new volume named website.
docker volume create website
2. List the volumes, you can see the new volume you just created.
docker volume ls
3. Download this website code from GitHub to your current working directory.
4. Run the below command to copy the website code you just downloaded to the website volume.
sudo cp -r /home/cloud_user/widget-factory-inc/web/* /var/lib/docker/volumes/website/_data/
5. Run the below command to list the files in the website volume.
sudo ls -l /var/lib/docker/volumes/website/_data/
You can see that the website code is now stored in the website volume.
6. Now you can start a new container and attach the website volume to it. You use the -v (volume) flag to mount the volume. You use the -p (port mapping) flag to map a port on the host to a port in the container. In this example, we are mapping port 80 on the host to port 80 in the container. Web1 is the name of the container.
docker run -d --name web1 -p 80:80 -v website:/usr/local/apache2/htdocs:ro httpd:2.4
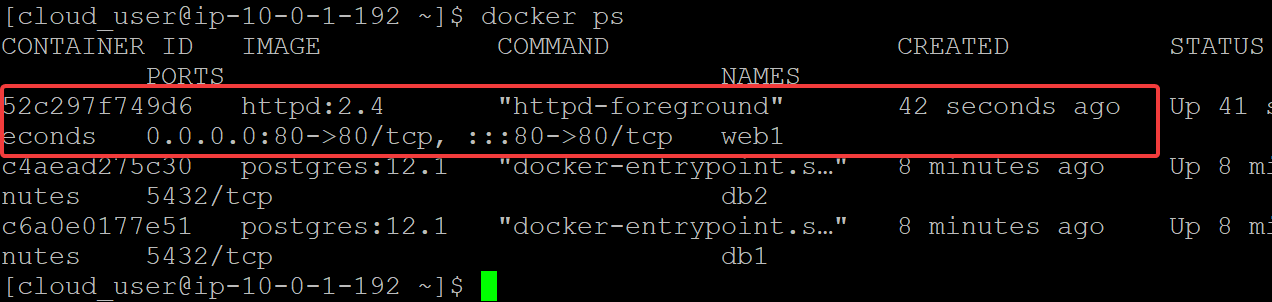
7. The website will now be served from the web1 container. Run the docker ps command to check the status of the web1 container. You can see that the website is being served from the web1 container. You can also see the port that the website is being served on(80) as shown below.
8. You can open the IP address of the host machine on your web browser to see the website you just copied.
9. Now run one more container named webTmp this time with the –rm flag to see what happens to the website volumn when you stop the webTmp container.
docker run -d --name webTmp --rm -v website:/usr/local/apache2/htdocs:ro httpd:2.4
10. Run a docker ps command show to verify that the webTmp container is running.
docker ps
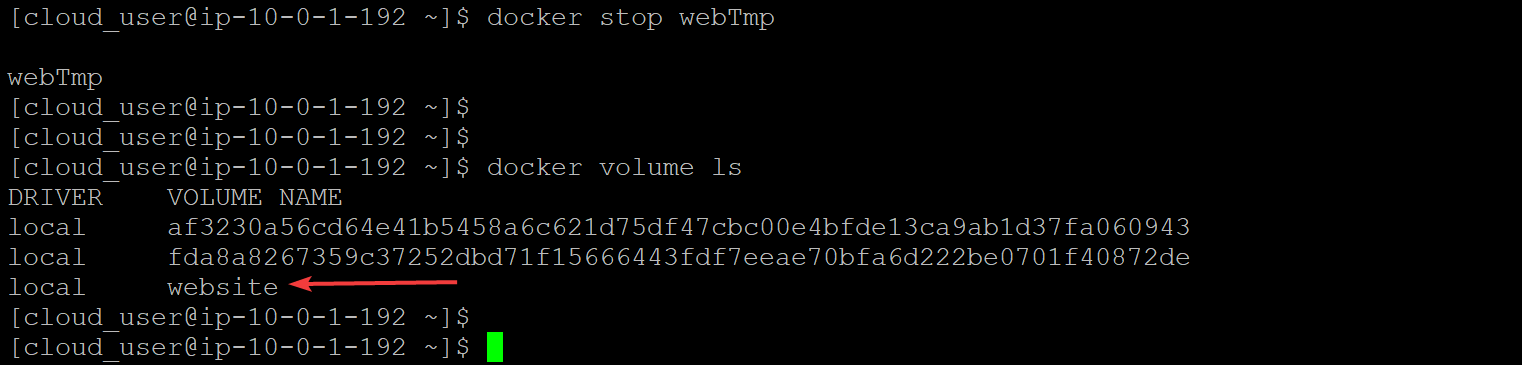
11. Now stop the webTmp container and list the volumes.
docker stop webTmp
docker volume ls
As you remember in the beginning of this article, when you stop a container, the volumes associated are also deleted. But this time, as shown below, you can see that the website volume is still there. So what happened?
The key takeaway in this example is that when you stop a container, the data in the volumes associated with that container are not deleted as long as the volumes are being used by another container. In this case, the website volume is still being used by the web1 container. This is a very important point to remember when working with Docker volumes.
Getting Rid of Unused Volumes
While volumes are a great way to store data and keep it organized, they can also take up a lot of disk space if they are not being used. If you are not using a volume, it’s best to remove it from your system to free up disk space. Luckily, Docker offers all the tools you need to remove unused volumes from your system.
1. Run the docker volume prune command to remove dangling resources (images, networks, volumes, and containers). A dangling resource is a Docker object not presently associated to a container. But before you remove a volume, make sure that no containers are using it. For example, you must remove the db2 container before you can remove the unused volumes associated with it.
docker stop db2
docker rm db2
docker volume prune
2. List the volumes and you can see that the db2 volume is now gone.
docker volume ls
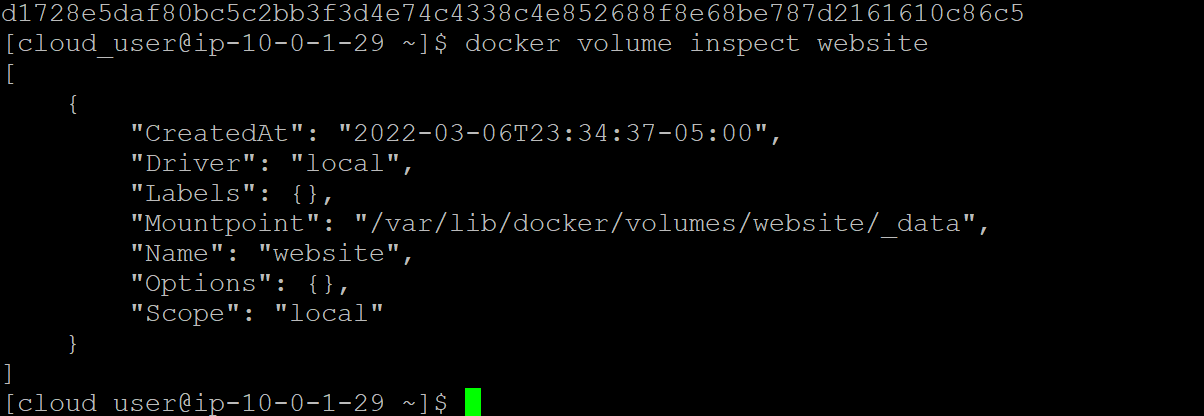
3. Run the below to find the location of your volume data for your website so you can back it up.
docker volume inspect website
You will see the Mount point for your website. The mount point is the directory on your host operating system where the docker volume is mounted. In this example, the mount point is /var/lib/docker/volumes/website/_data, as shown below.
4. You can use the tar command to back up the contents of your website volume. It has been around for a long time and is supported on most platforms. The tar command can be used to back up a directory, including all of its subdirectories and files.
Note: you MUST run this command as the root user or else you will not have permission to write to the mounted docker volume, as shown below.
tar czf /tmp/website_$(date %Y-%m-%d-%H%M).tgz -C /var/lib/docker/volumes/website/_data .
5. Run the below command to verify that the tar backup file was created successfully.
ls -l /tmp/website_*.tgz
6. Run the below command to verify that the backup file contains the correct data. Replace YOUR_BACKUP_FILE_NAME with the actual name of your backup file.
tar tf /tmp/.tgz
7. Now let’s run one more container using the website volume. This time you will be using the -it flag to interactive with the container to test the backup.
docker run -it --rm -v website:/website -v /tmp:/backup bash tar czf /backup/website_$(date %Y-%m-%d-%H-%M).tgz -C /website .
8. Move into the volume directory and remove all the website data.
9. List the contents of the directory to see that the website data is gone.
ls -l
10. Run the below command to restore the website data. Replace with the actual name of your backup file.
tar xf <YOUR_BACKUP_FILE_NAME>.tgz .
11. List the contents of the directory to verify that the website data has been restored.
ls -l
Conclusion
In this guide, you have learned how to create, back up a docker volume and restore the data. You also learned where to find the mount point for your docker volume.
Docker has been gaining a lot of popularity recently because it makes it easy to deploy applications. However, with great power comes great responsibility. It is important to back up your docker volumes to prevent data loss in the event of a disaster.
There is a lot to learn about Docker. If you want to have a more in-depth look at Docker, we suggest checking out its documentation, where you will find all the information you need to get up and running with docker.


