
Transform your videos into professional-quality masterpieces with Movavi Video Editor. Let’s check out how to use Movavi Video Editor to put stickers, track objects, make them move, and blur faces with its AI-assisted video editing.
While AI can’t replace creatives entirely, its integration can prove helpful to a certain extent. Like many domains, we have boring stuff to take care of before jumping to the crux of any task. This is where automation kicks in, saving us from jobs we never wanted to do in the first place.
However, that’s not it. With its pinpoint accuracy and speed, AI can be much more efficient in video editing, particularly. In this article, I will illustrate a few things Movavi Video Editor helps me do with its AI, after a short introduction.
Movavi Video Editor
Movavi Video Editor is an AI-powered tool to help you make your videos look stunningly professional. And all that happens without a steep learning curve beginners dread.
It has got an easy-on-eyes interface, with all the settings at your fingertips.
Movavi’s biggest strengths remain its user-friendly experience and support documentation, which guide users through harnessing their full capabilities.
I have tried a few things with its AI. Take a look.
How to Put a Sticker/Text on a Moving Object?
Technically called motion tracking, adding a sticker or text on a moving object in a clip used to be a tedious task. But thanks to Movavi AI integration, all you need to do is a few clicks, and you’re done. Here’s the step-by-step process:
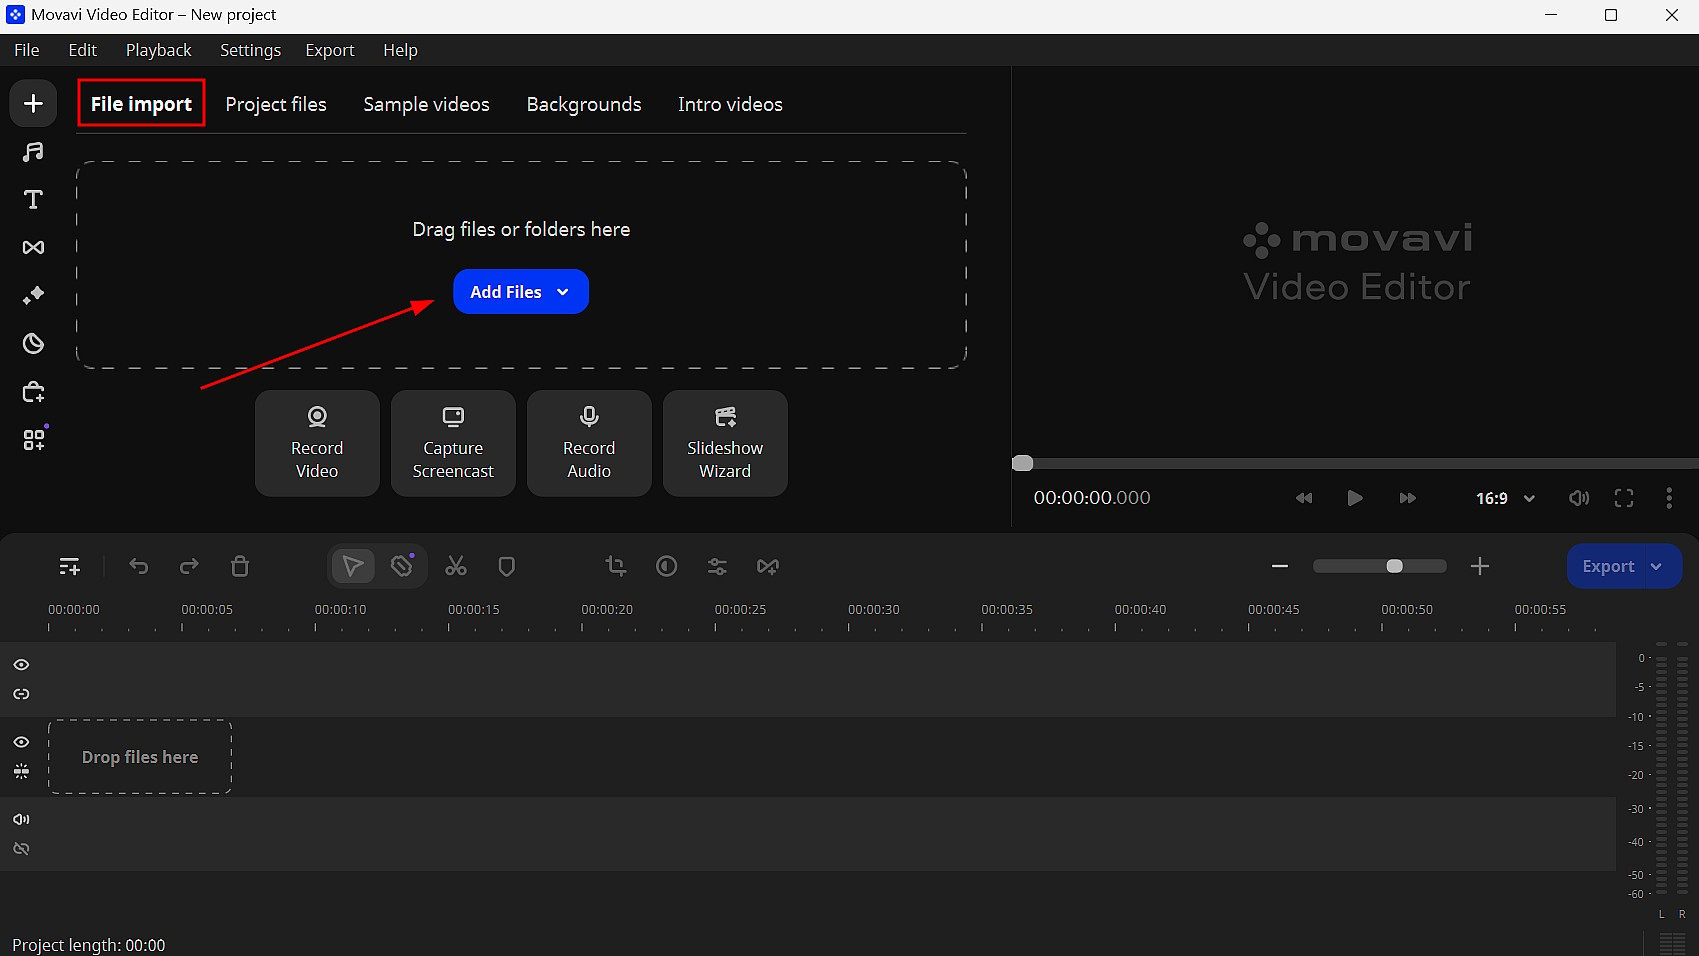
Step 1: Import the file in the File Import section from the Movavi user dashboard.
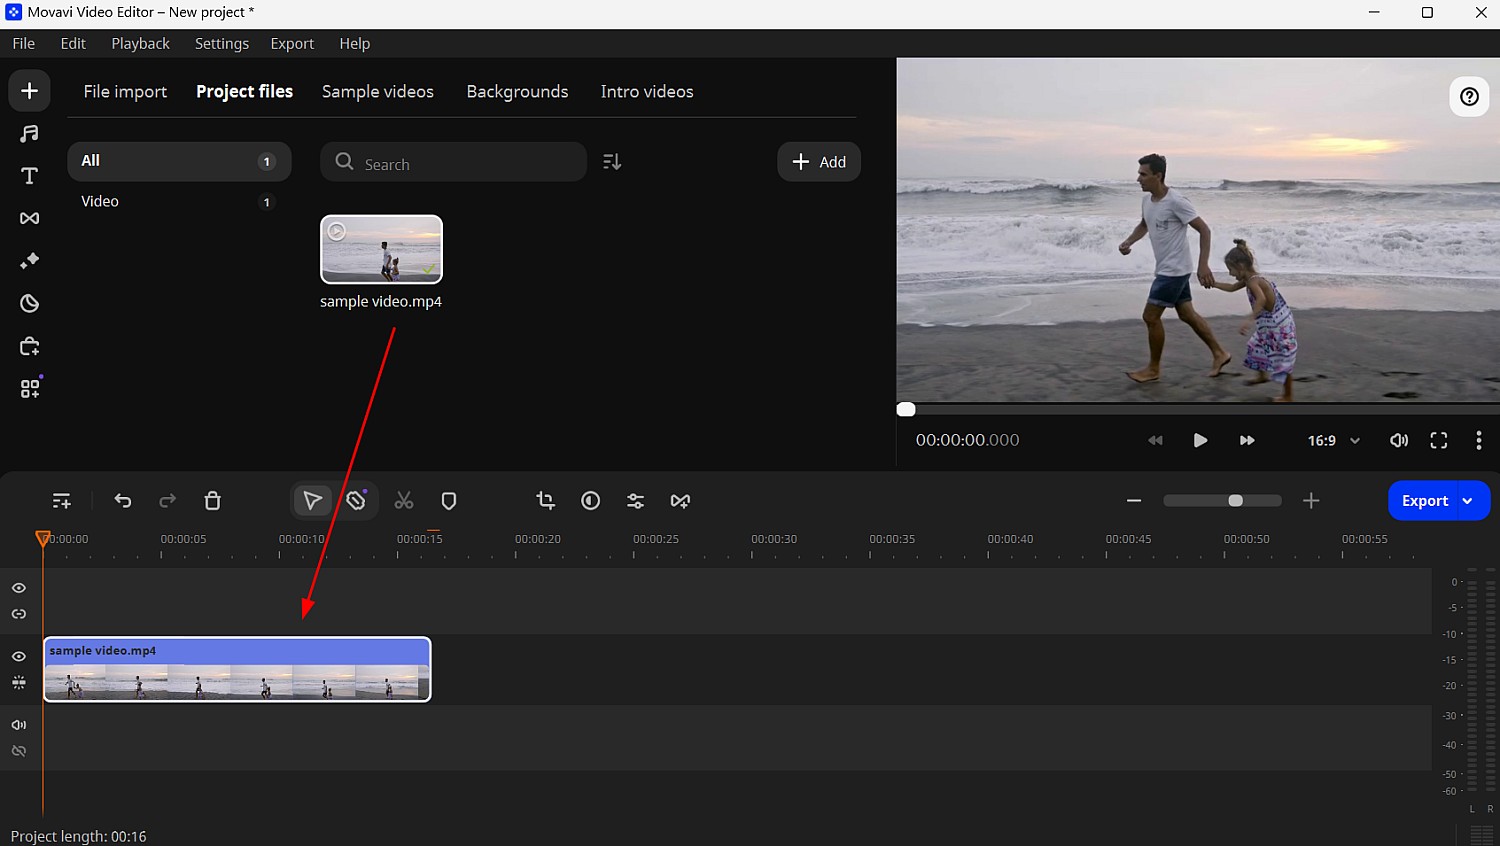
Step 2: Drag that file onto the timeline.
Step 3: This involves adding stickers, emojis, or text for motion tracking. I have gone with the Elements tab from the left panel. There are a few free elements, and you can also go for the Movavi Effects Store subscription for premium objects.
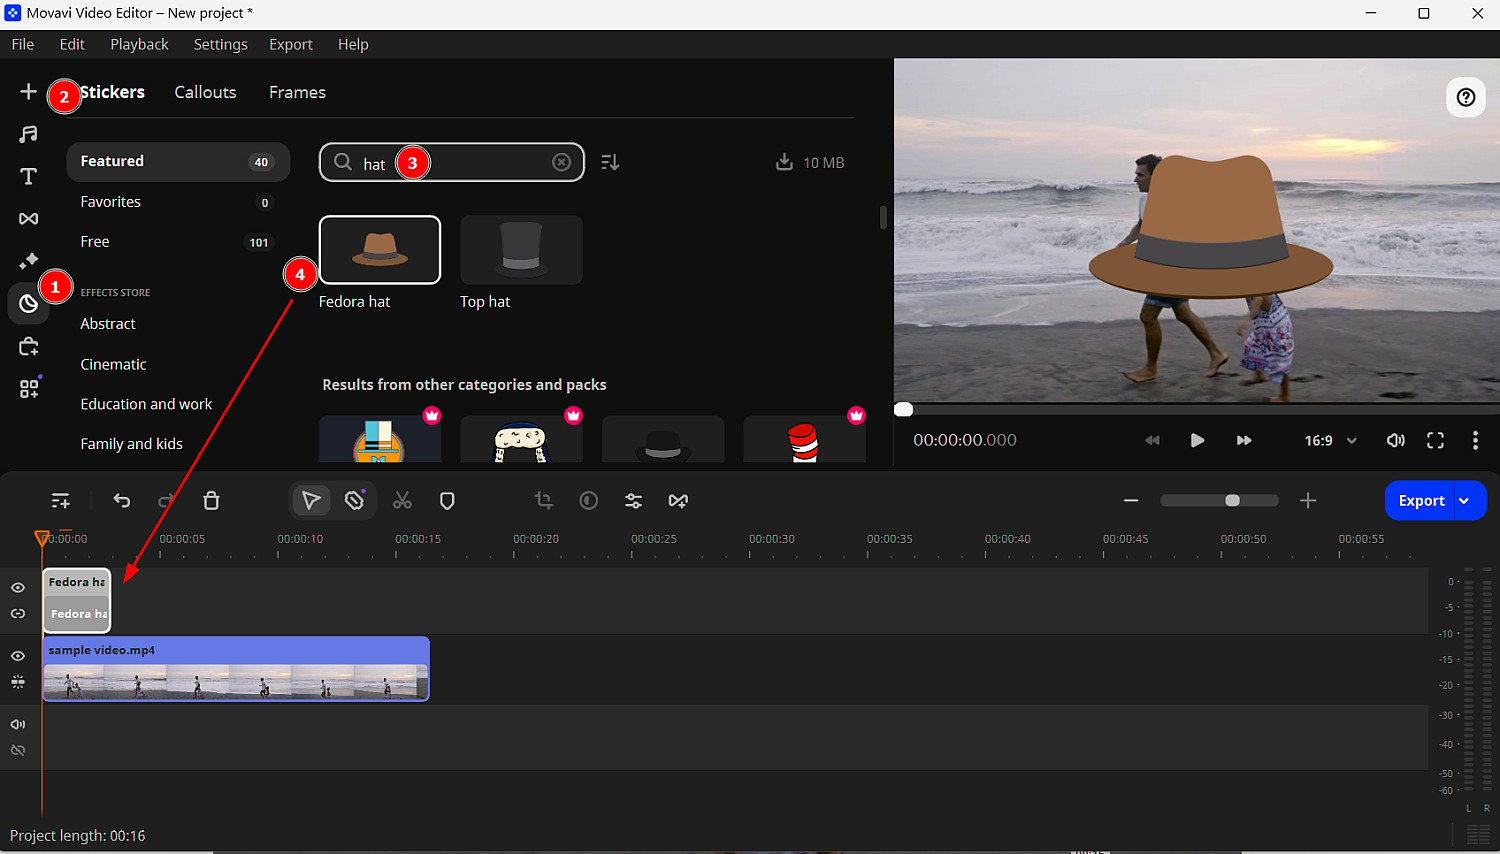
After selecting your preferred element, drag that to the top of the video in the timeline. You can also extend that element to match the video timing or time it as per your preference.
Step 4: Now select the element by double-clicking over it on the timeline and go with Motion tracking in the Clip Editing section.
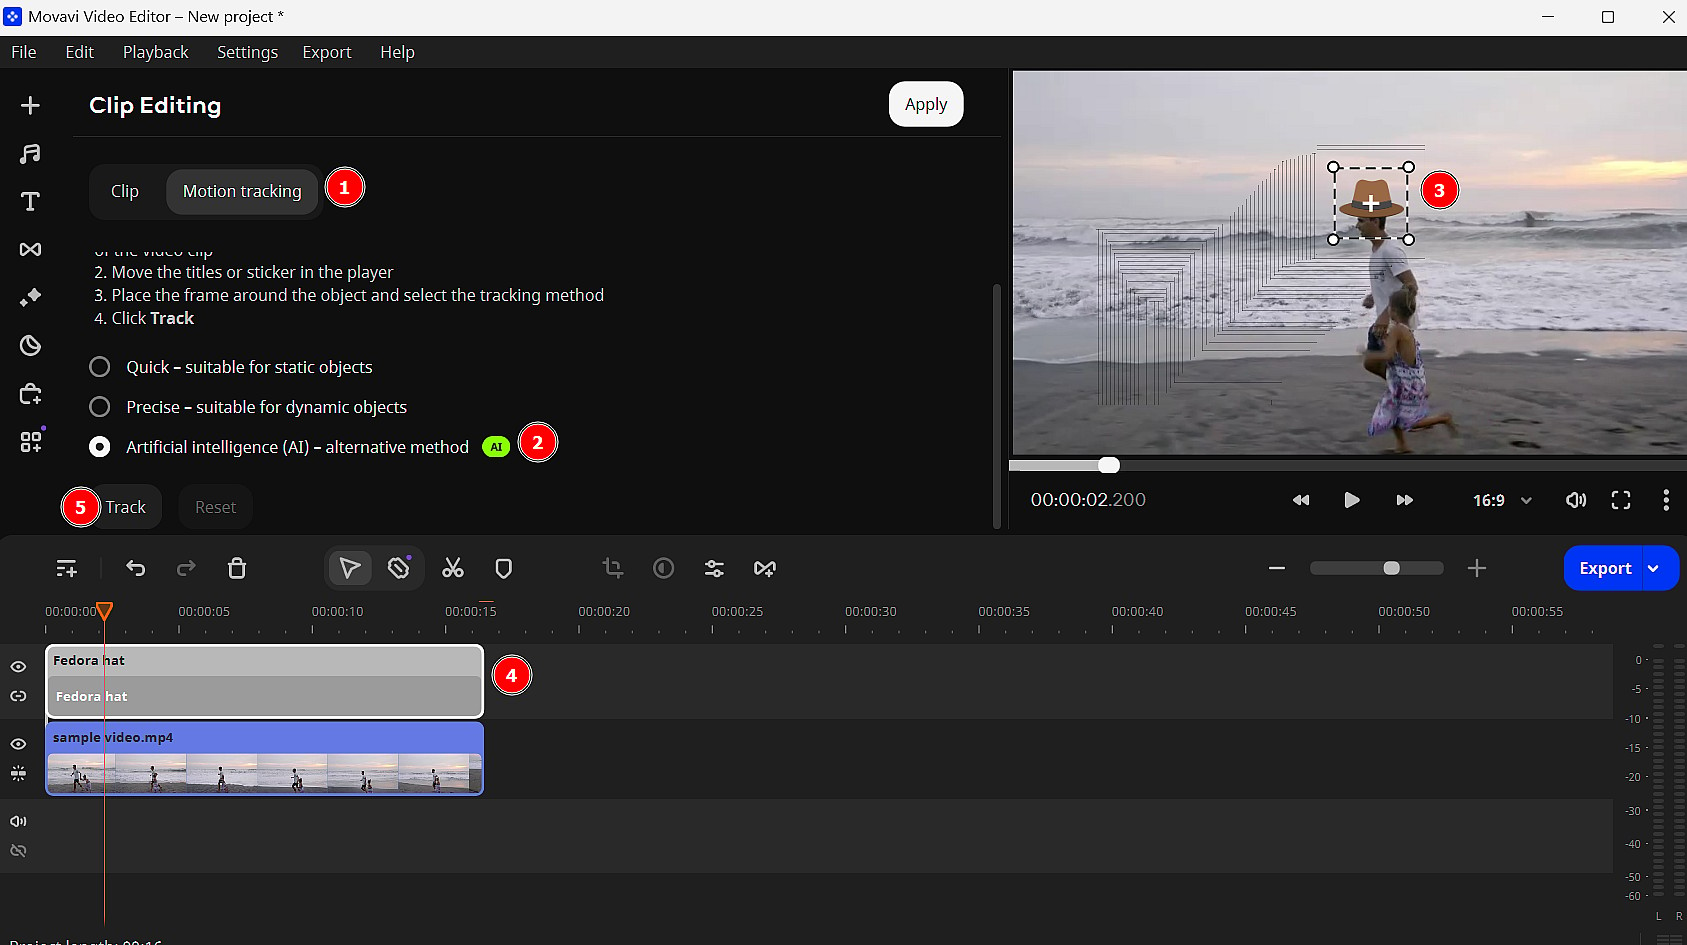
There are three methods to go about it: Quick, Precise, and AI. Needless to say, we will go with the last one to see how efficient is Movavi’s AI in fixing a sticker on a moving object.
Therefore, select Artificial intelligence (AI) – alternative method.
This will give a box (frame) that one must put over the element before clicking Track. For instance, in my case, I have put the hat over the man and dragged the frame to tightly cover it.
Step 5: Finally, click Apply to save the changes or Reset to go over it again.

Step 6: Export the result. One can export the entire video or a fragment in various available formats and desired quality.
How to Track Moving Objects in Video?
This is very similar to the motion tracking we have done in the previous section. However, the motive here is to draw attention to the important elements of a video.
Step 1: Import the file to the Movavi Video Editor.
Step 2: Click More tools from the left panel and click Highlight and conceal. Choose a mask from the list.
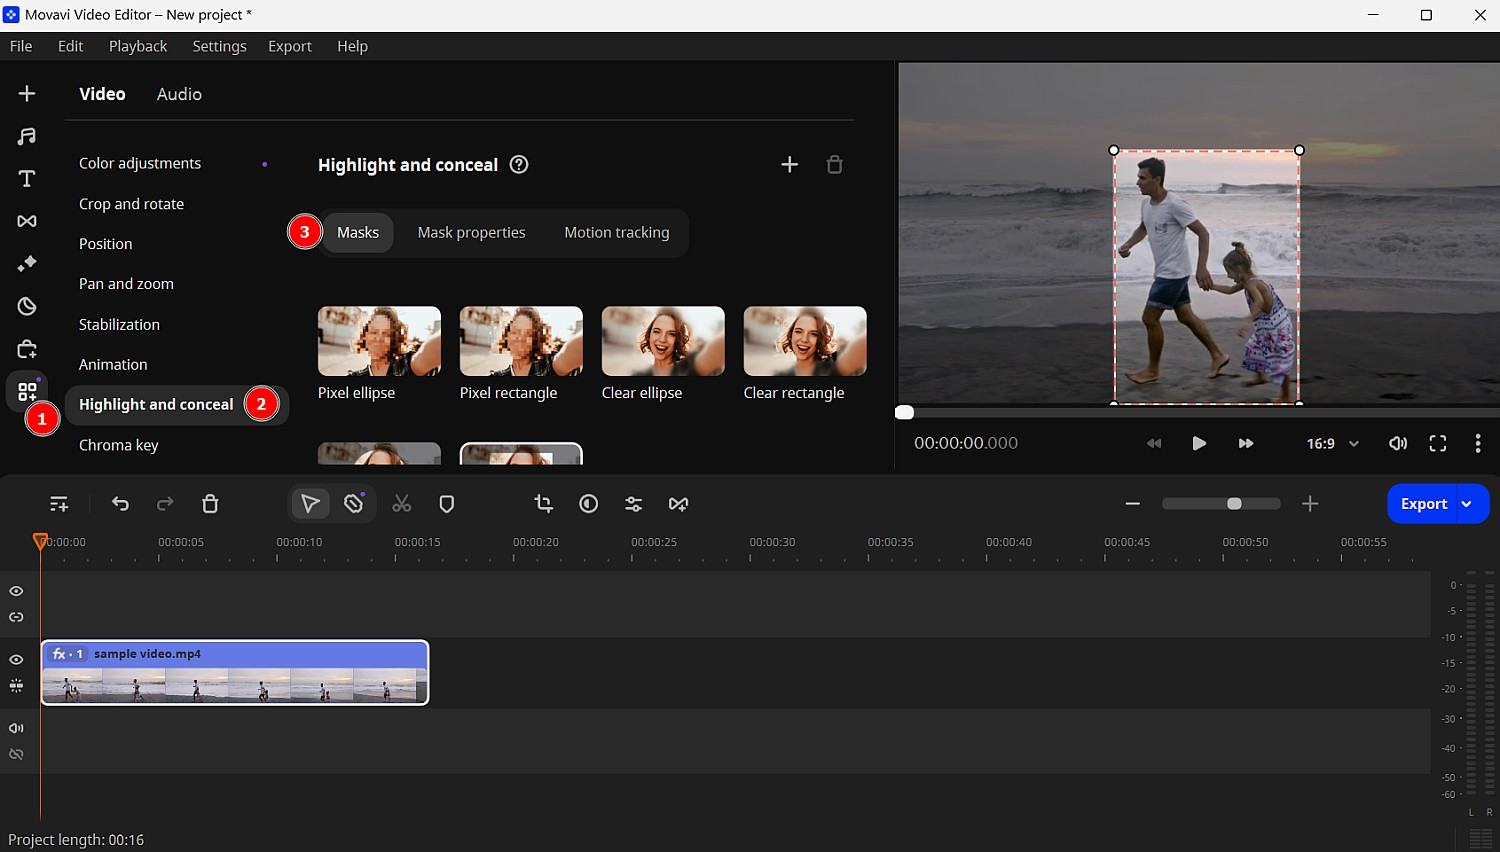
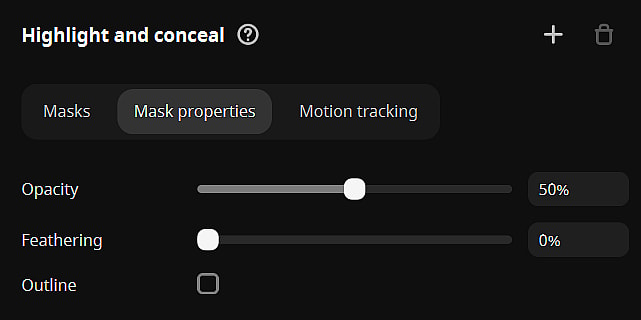
Step 3: Configure Mask Properties if required. These help you adjust the mask opacity, put a feathering effect, and place an outline.
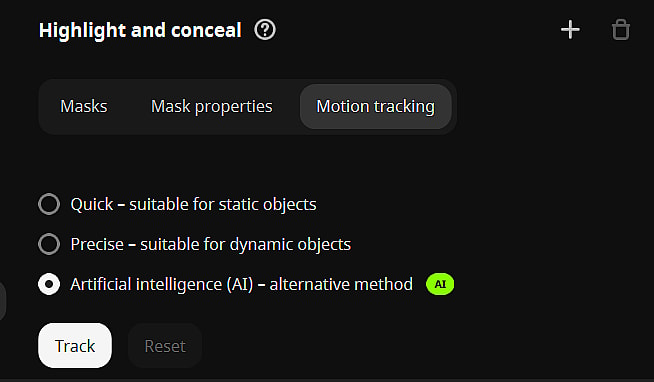
Step 4: Head over to the Motion tracking tab, select the third option, and click Track.
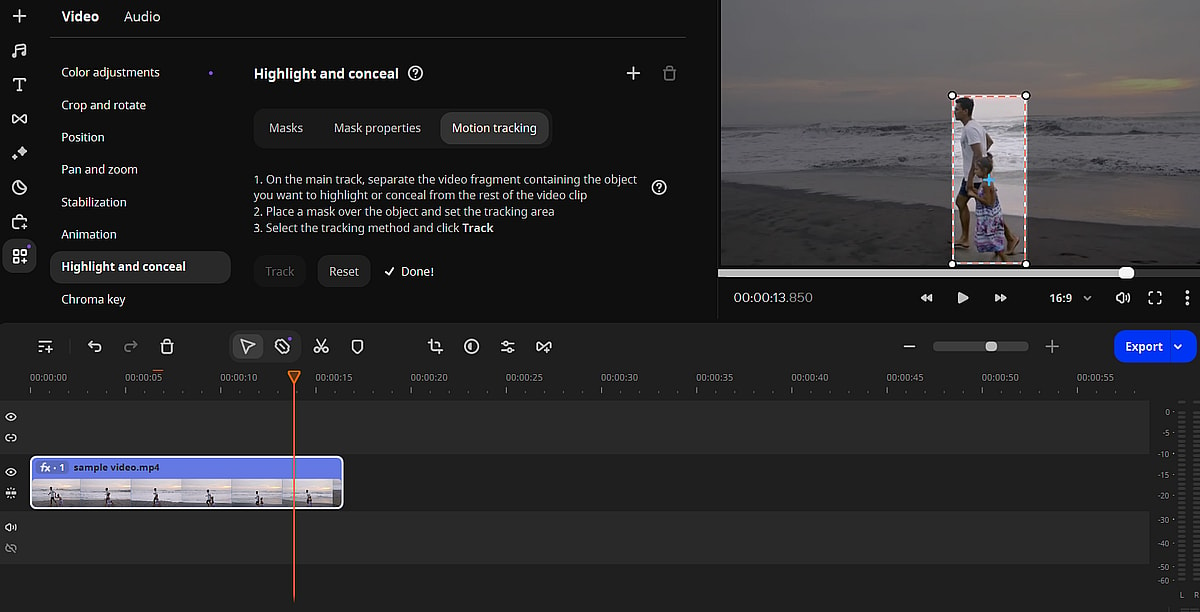
Step 5: Finally, check the preview or click reset.
How to Make Objects Move in Video?
How to make objects is an extension of the “putting sticker on a moving object” we did earlier. However, two things make it slightly different, which we will see in the following steps.
Step 1: Add the video asset to the Movavi dashboard.
Step 2: Previously, I added the elements from the Movavi (free) repository. However, this doesn’t allow us to set the position (we’ll discuss) in the later part of this process. That’s why I added the image assets separately.
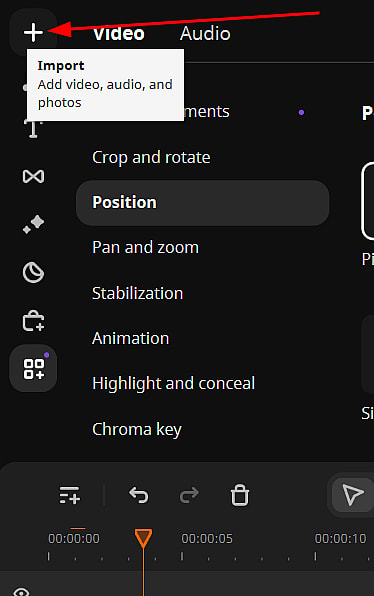
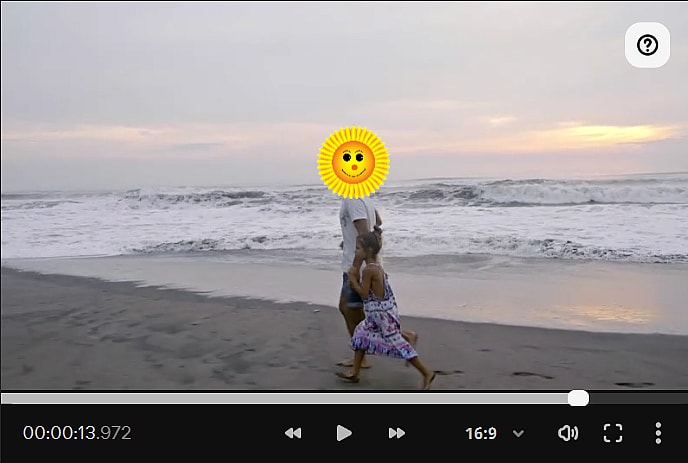
Step 3: Now add the motion tracking to the image element, as illustrated in steps four and five of the first tutorial. I have added an icon over the man’s head.
Step 4: Now enter the More tools section in the left panel and click Position.
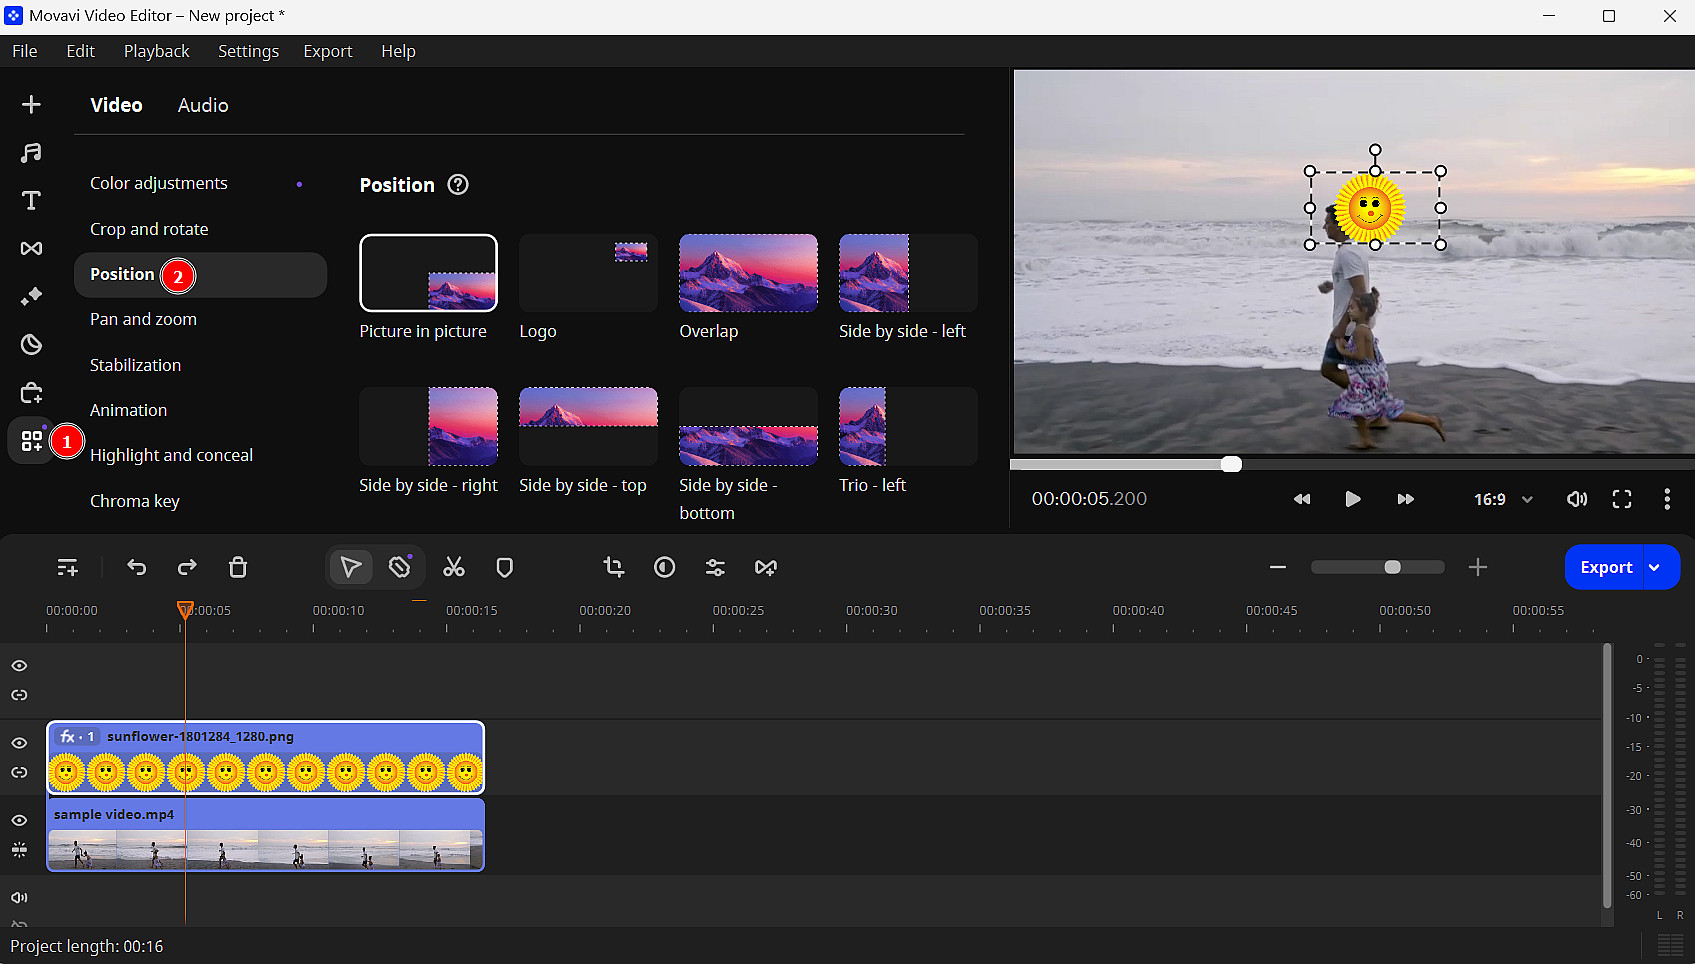
Choose from the preset positions or adjust your own, and keep checking the preview to find out the best one. In addition to the position, one can play with the element’s size too.
Please remember that the element’s position will always be relative to the original motion tracking frame, preserving the effect already applied. This will help create a moving object effect for videos.
Finally, export the entire video or a fragment as suited.
How to Blur Face in Video?
Sometimes, blurring a face/object is critical for the subject’s privacy. It can be a face, an address, a number plate, or anything else you want to conceal. Since we want to do this to a video, this becomes another case where we need to apply motion tracking.
Sounds complicated, but it isn’t, at least not with Movavi Video Editor. It just takes a few clicks to blur someone’s face or a moving object, as shown below.
Step 1: Import the video into the Movavi user dashboard.
Step 2: Open the More tools from the left, click Highlight and conceal, and choose a preferred mask.
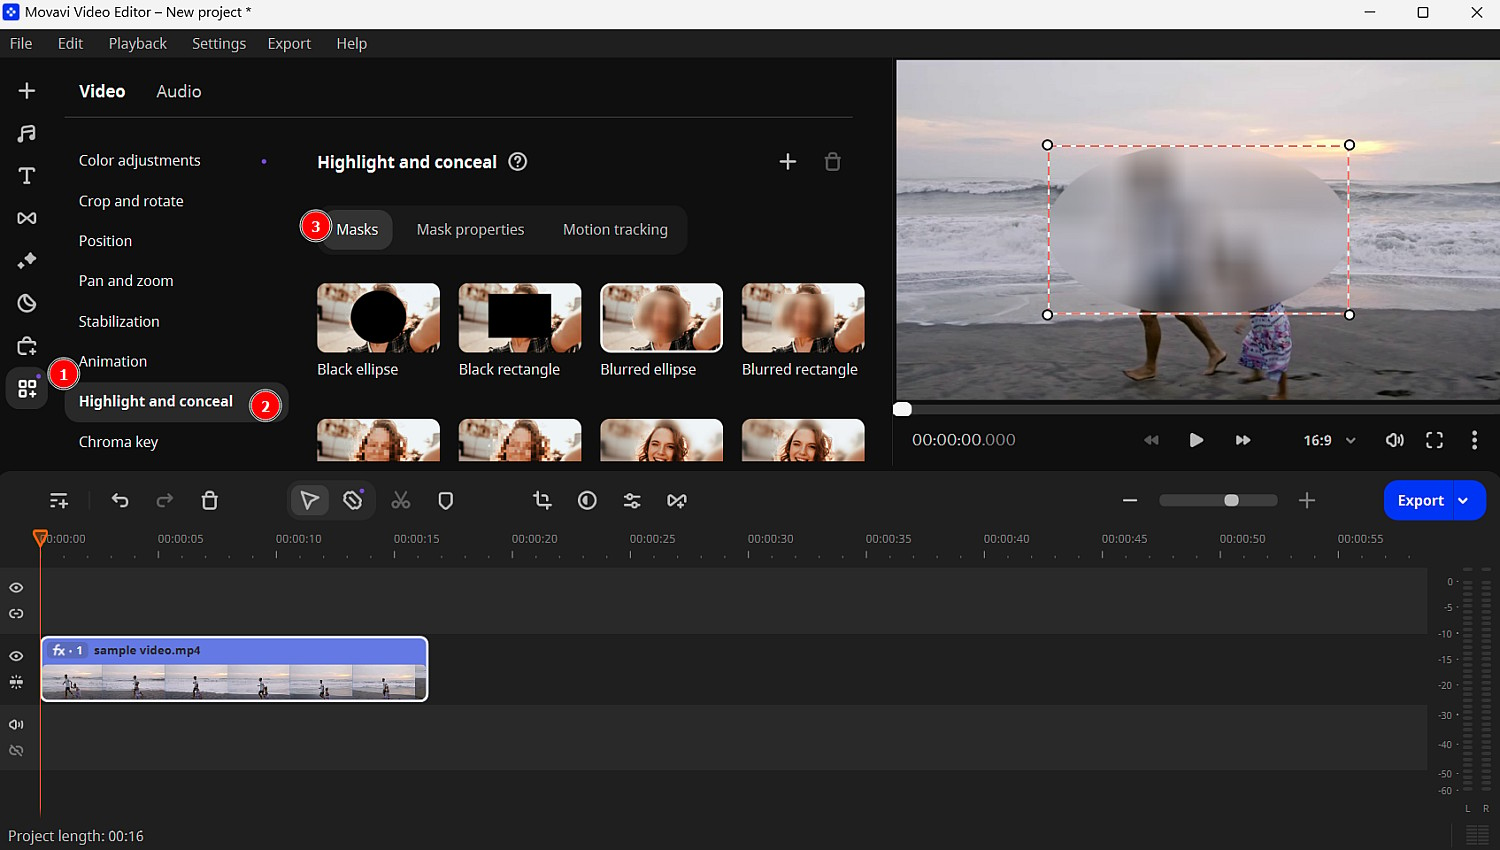
Step 3: Adjust the mask’s size and position. Next, click Mask properties to tweak the mask’s opacity, feathering, and outline.
Step 4: Finally, click on the Motion tracking tab, choose the method, and click Track.

Step 5: Check the preview or click Reset to do it again. Finally, click Export to download it to your device.
Video Editing Made Easy!
Frankly, I hardly do video editing as my main job. Even so, it was surprisingly easy with Movavi Video Editor.
All those cool effects you see on social media are literally just some clicks away. Add to that the in-depth documentation, and beginners will have an easy time being pros.
You can download Movavi video editor and have its premium features in the 7-day free trial.


