
Django is a web application framework written in python that follows the MVC (Model-View-Controller) architecture, it is available for free and released under an open-source license. It is fast and designed to help developers get their applications online as quickly as possible. Django helps developers to avoid many common security mistakes like SQL Injection, XSS, CSRF, and clickjacking.
Django is maintained by the Django Software Foundation and used by many big technology companies, governments, and other organizations. Some large websites like Pinterest, Mozilla, Instagram, Discuss, The Washington Post, etc. are developed with Django.
In this tutorial, we will show you how to install Django 3.0 on the latest Ubuntu 20.04 server. we will install Django with Python 3 (as default version on Ubuntu 20.04), and we will show you 4 different ways to install Django Framework, install through the Apt repository, pip, and using the Python Virtualenv.
What we will do?
- Setup Python and Pip
- Install Django Framework
- Create Your First Project with Django
Step 1 – Setup Python and Pip
In this first step, we will set up Python and Pip on the Ubuntu 20.04 system.
By default, the Ubuntu 20.04 cames with the Python 3 as default python version. it’s available as a ‘python3’ command, not a ‘python’.
Check the python command as below.
pythonYou will get the ‘python’ command is not found.
Command 'python' not found, did you mean:  command 'python3' from deb python3
  command 'python' from deb python-is-python3
To solve this, make a symbolic link of the Python3 binary ‘/usr/bin/python3’ to ‘/usr/bin/python’ as default python command using the following command.
update-alternatives --install /usr/bin/python python /usr/bin/python3 1Now check the python command as below.
python --versionAnd you will get the following response.
Python 3.8.2The configuration of Python3 has bee completed.
Next, we will install the package manager for python packages ‘python3-pip’.
Install python3-pip using the apt command below.
sudo apt install python3-pip -yOnce all installation is completed, make the ‘pip3’ command as default ‘pip’ version.
update-alternatives --install /usr/bin/pip pip /usr/bin/pip3 1After that, check the pip command below.
pip --versionBelow is the result you will get.
pip 20.0.2 from /usr/lib/python3/dist-packages/pip (python 3.8)As a result, the installation of the Python package manager (pip) has been completed.
Step 2 – Install Django Framework
After installing and configure Python and Pip, we will install the Django Framework on our system. Thre are 4 different to install the Python Django Framework, install using the Apt repository, using pip command, using the virtualenv, or using the Django git version.
Install Django with Apt
By default, the Ubuntu 20.04 repository provides packages for Django Framework named ‘python3-django’. At this time (tutorial writing), the Ubuntu repository provides the Django 2.2.12, which is not the latest stable version of Django.
Check the ‘python3-django’ package using the apt command below.
apt show python3-djangoAnd you will get details about the ‘python3-django’ package.
To install the package, run the apt command below.Advertisements
apt install python3-djangoOnce all installation is completed, check the Django version using the following.
django-admin --versionYou will get the following result.
As a result, Django 2.12 is installed on the ubuntu 20.04 through the official Ubuntu repository.
Install Django with PIP
The main advantage of installing the Django Framework with the pip command through the PyPI repository is that you can choose the right version of Django for your project.
For this section, we will install the Django 3.0 (latest stable version) from the PyPi repository.
Install Django framework 3.0 using the pip command below.
pip install django==3.0.0Once all installation is completed, check the Django version using the following command.
django-admin --versionAnd you will get the Django version 3.0 as the response.
optionally, you can check through the Python interactive shell, run the python command below.Advertisements
pythonImport the Django module and show the Django version using the following query.
import django
print(django.get_version())
You will get the Django 3.0 response as below.
As a result, you’ve successfully installed the Django 3.0 using the PyPi repository.
Install Django with Virtualenv
This is the most recommended practice for installing Django Framework, by using the python Virtualenv. It’s a python environment builder that can be used to create isolated python environments.
You can choose the Python version that will be installed in the virtual environment, and all installation in the Python virtual environment will not affect the system. This is very useful for developers, they can run and develop an application with different python versions and different environments on one OS.
First, install the Python virtualenv packages from the PyPi repository using the pip command below.
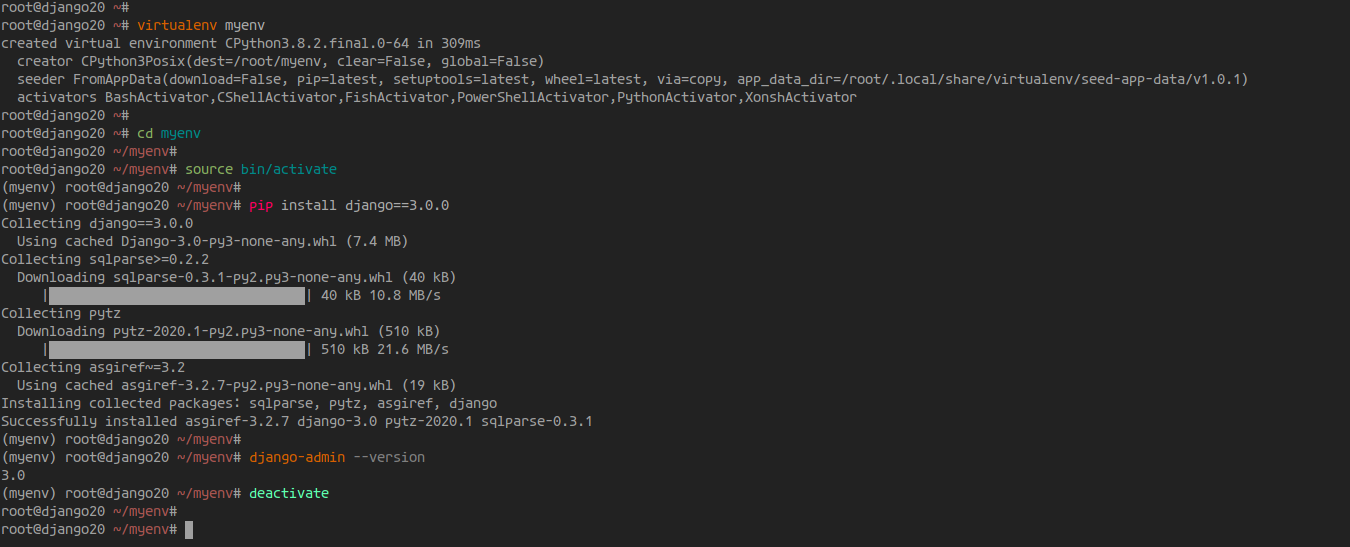
pip install virtualenvOnce all installation is completed, create a new Python virtual environment ‘myenv’ using the following command.
virtualenv myenvNow go to the ‘myenv’ directory and activate the virtual environment using the command as below.
cd myenv/
source bin/activate
After that, install the Python Django Framework using the pip command below.
pip install django==3.0.0And the Python Django Framework is now installed on the Python virtual environment. Check the Django version using the following command.
django-admin --versionYou will get the Django 3.0 as the response, and the Django Framework is installed on the Python virtual environment.
To back to the normal user and deactivate the virtual environment, run the command.
deactivateNow you will be switched back to the normal user environment of your system.
Install Django from Git Repository
This method is recommended if you want to install the development version of Django Framework.
First, install the git packages using the apt command below.
apt install gitNext, create a new virtual environment named ‘django-git’ using the virtualenv command below.
virtualenv django-gitGo to the ‘django-git’ directory and activate the virtual environment.
cd django-git/
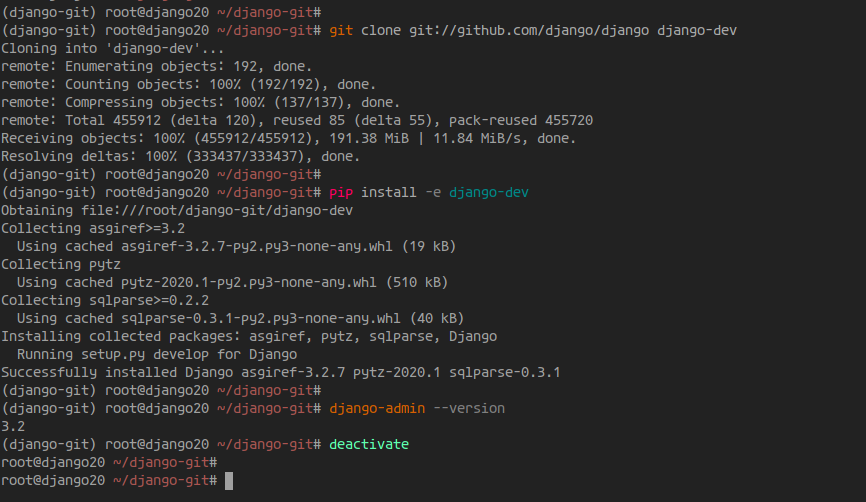
source bin/activateClone the latest Django version from the official Django GitHub repository and install the Django development version using the pip command as below.
git clone git://github.com/django/django django-dev
pip install -e django-dev
Once all installation is completed, check the Django version.
django-admin --versionAnd you will get the latest version of the Django Framework development version.Advertisements
Now you’ve learned how to install Python Django using multiple ways.
Step 3 – Create Your First Project with Python Django
After installing the Django project, we will show you how to start a new project with the Python Django framework.
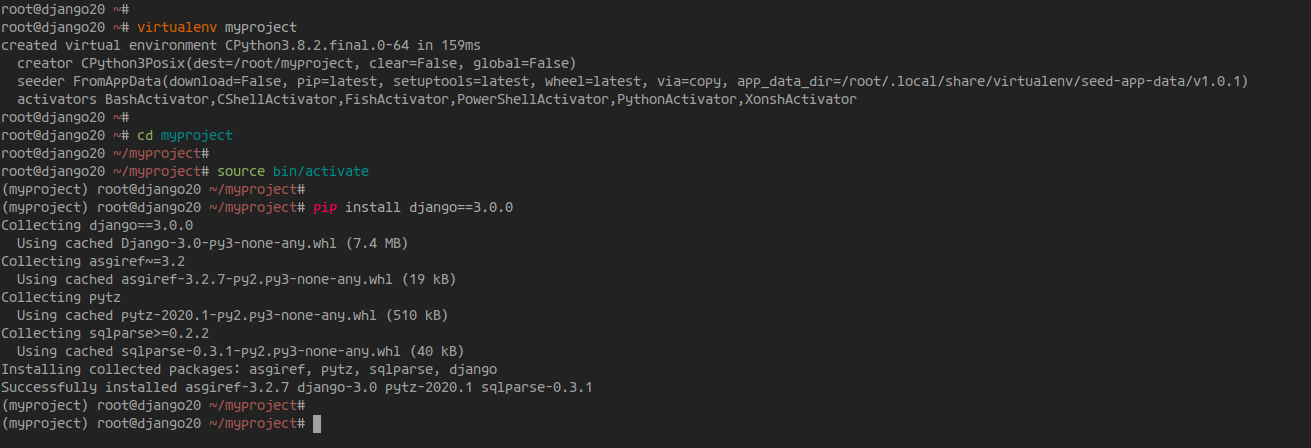
Create a new virtual environment ‘myproject’.
virtualenv myprojectGo to the ‘myproject’ directory and activate the virtual environment.
cd myproject/
source bin/activate
After that, install the Django 3.0 using the pip command as below.
pip install django==3.0.0Now you’ve installed the Django Framework.
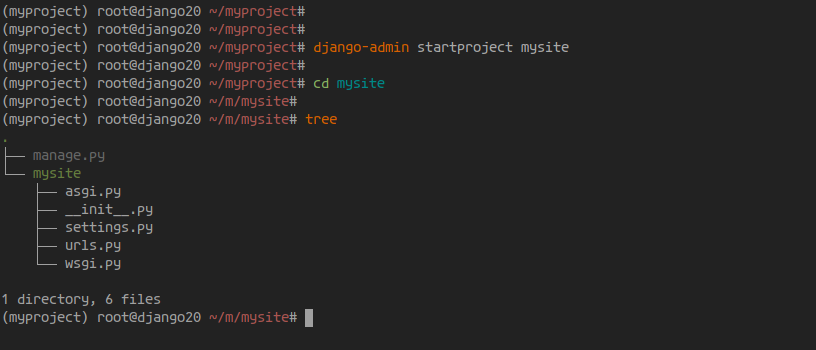
Create a Django project named ‘mysite’ using the ‘django-admin’ command as below.
django-admin startproject mysiteNow you will get a new directory named ‘mysite’ which contains all Djaango configuration.
Go to the ‘mysite’ directory and check all files configuration.
cd mysite/; treeBelow is the result you will get.
Next, edit the configuration ‘settings.py’ inside the ‘mysite’ django directory.
vim mysite/settings.pyOn the ‘ALLOWED_HOSTS’ configuration, input your IP address as below.
ALLOWED_HOSTS = ["your-server-ip"]Save and close.
Next, we will migrate the database for our Django project. By default, the Django framework used the SQLite database.
Migrate the Django database using the following command.
python manage.py migrateAfter that, create a new admin user for your Django project.
python manage.py createsuperuserNow type your username, email address, and the password, then press enter.
As a result, the default database SQLite for the Django project has been migrated, and the admin user has been created.
Step 4 – Start the Python Django Project
After migrating the database of the Django project, we will run the Django project.
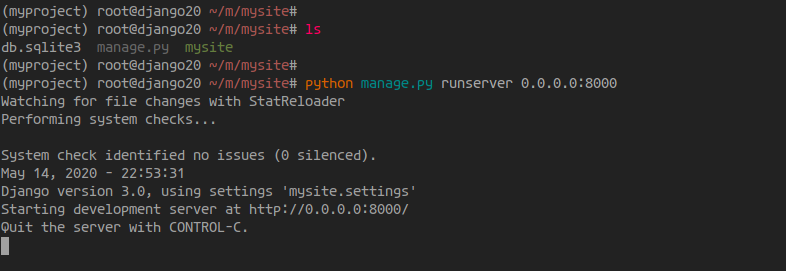
Run the Python Django runserver command below.
python manage.py runserver 0.0.0.0:8000As a result, your Django project is now up and running on port ‘8000’.
Open your web browser and type the server IP address with port ‘8000’ on the address bar.
http://10.5.5.32:8000/
And you will get the default Django home page.
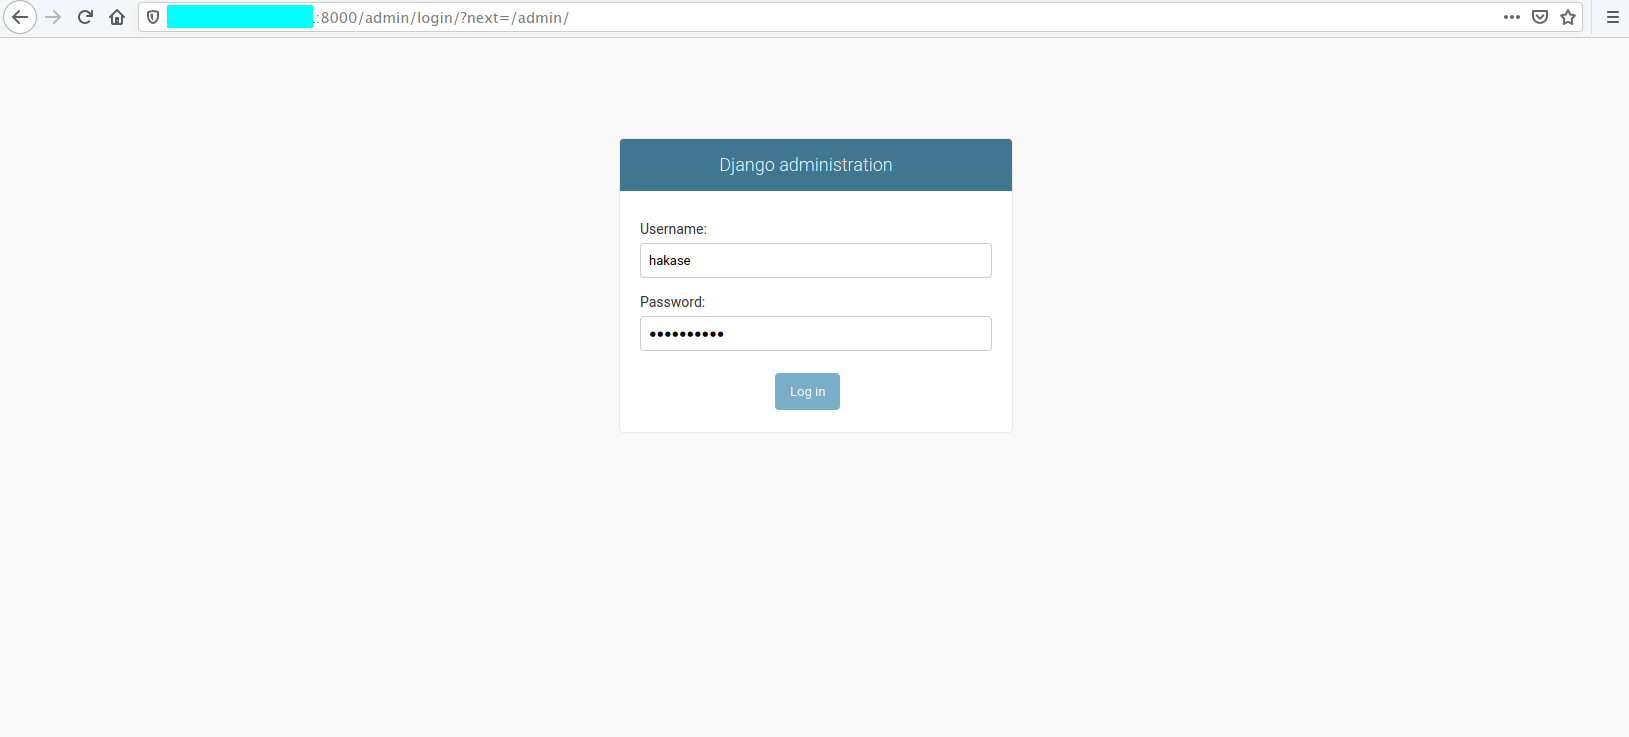
Next, add the ‘admin’ path on the address bar and you will get the Django admin login page.
http://10.5.5.32:8000/admin/
Type your username and password, then click the ‘Login’ button.
And you will get the default Django admin dashboard as below.
As a result, the installation of the Django Framework with Python 3 on Ubuntu 20.04 has been completed successfully.


 on Ubuntu 24.04")